On this page
Along with posting articles on services such as blogs.kent you can publish 'posts' on your website. You can also assign categories to your posts, so it is possible to post news articles, projects, events information, and more
Publishing a post
Posts are much simpler t.han pages in the content structure since they do not use the page builder with panels.
There are five key things to consider when publishing a post:
- Post title
- Feature image
- Lead text
- Main content
- Category
To add a new post, go to your websites dashboard area, hover over ‘Posts‘ and click ‘Add New‘.
You will be taken to a blank edit page for a new post. Here you can write your post’s title and text, as well as add in a featured image, lead text, and canonical link if required. When you are ready, click on the blue ‘Publish‘ button.
If you have a news panel set to a specific category, such as ‘News‘ or ‘Events‘ do not forget to add this category to your post in order for it to be displayed. Please see the Post Categories section below.
See also
Post categories
Post categories are used to differentiate posts and by using the News panel you can display a list of posts just for one specific category. This means you can have category specific pages of posts, such as projects. Generally, once categories are setup you shouldn’t have the need to go and edit them again.
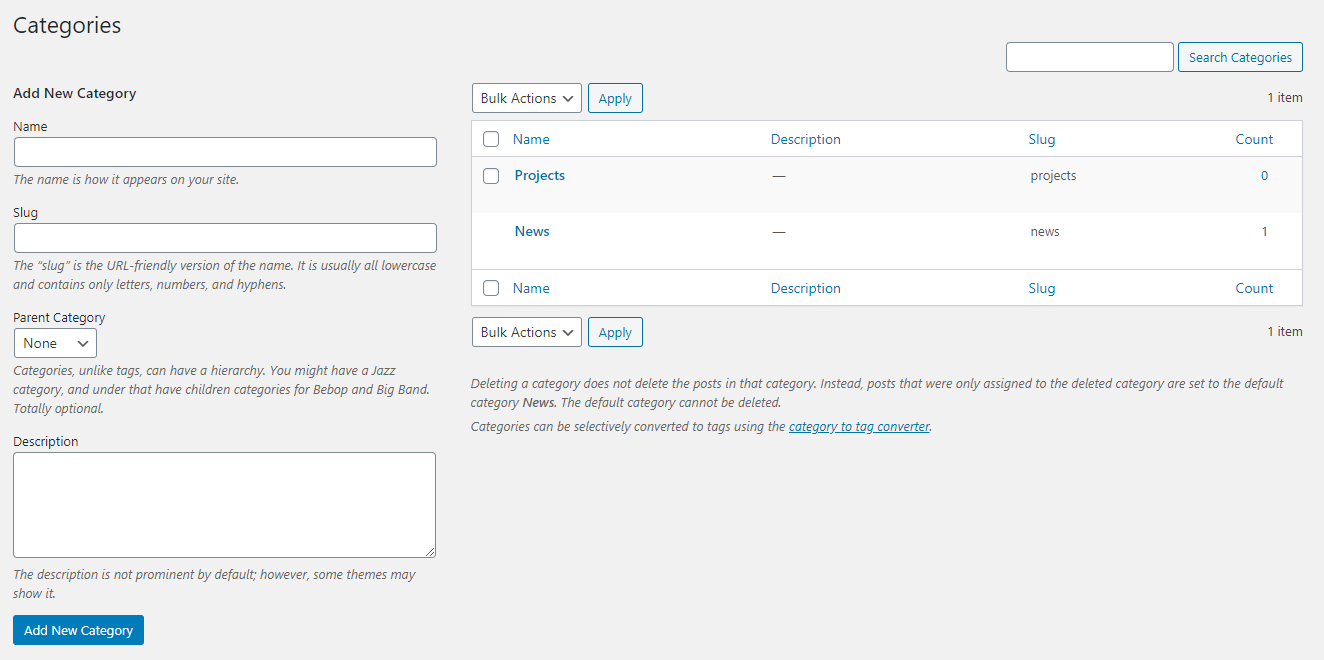
To create a new category:
- Hover over the ‘Posts‘ link on the main menu within the dashboard and ‘Categories‘
- To add a new category just enter a name in the ‘Name’ field. You do not need to add a ‘Slug’, this will be automatically generated if left blank
- You can assign it a ‘Parent category’ and give your description a category if desired, but if you only plan to have one or two categories these options won’t be necesaary
- Once you are done click the ‘Add New Category‘ button to save
You can edit existing categories by hovering your cursor over the relevant category title and clicking on the ‘Edit‘ button below. This will take you to an edit screen where you can make changes.
Previewing a post
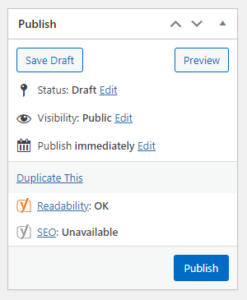 You can view a draft of your post whilst making writing it in order to see how it will look once published. To do this just click on the ‘Preview‘ button within the publish box on the right hand side of the screen. This will open a new tab and display your post. At this post your post is not live and has not been published. If you close both the preview and edit screen tabs you will lose your post or any changes you were making to an existing post.
By default only people with administrative access to a site can view a draft post. It is however possible to share a post with non logged in users, although a plugin has to be activated for this feature to be available. Please refer to the ‘Public Post Preview’ page for more details.
Post status
Whilst working on a new post its status will be draft, and you can choose to ‘Save Draft‘, allowing you to leave it and come back another time to continue editing. A draft post is only viewable by those logged into the site and not the general public. Once the post has been published then the status will change to ‘Published‘ and anyone can view it.
If you wish to take down a post from public access but wish to retain it for future reference we recommend changing the status to ‘Draft‘ and clicking on ‘Update‘. This is preferable to clicking ‘Move to Bin‘ since WordPress automatically deletes all items in the bin after 1 month, whilst a draft item can remain indefinitely until required once again.
Published date
The published date always becomes the date and time of when the post was published, but it is possible to change this to either a historical date (useful when adding in posts already published elsewhere), or use a future date. If you select a date and time in the future WordPress will automatically publish it at that chosen time.
Revisions
WordPress includes a tool to review previous changes to your site. This is via the ‘Revisions‘ option within the publish box. Here, if you have made changes to a page / post it will tell you how many, and provide a link to browse these revisions. Here you will be able to see the changes made and reinstate a previous iteration if desired. PublishPress.com have a very helpful guide on revisions if you are interested.
How to display your posts
To display posts on a page you will need to use the News panel. You can use this panel either on its own or alongside other panels, and it has options to control which category to display, how many posts to display at once, and even control the panels background colour.
Head over to the News panel page to read up more on how to use it.
Password protected content
It is possible to limit the access to a page or post, requiring the need for the user to enter a password to view the content.
To do this set the visibility to ‘Password protected‘, you will then need to set a password. Ensure you then click ‘Update‘ to apply the change. Once protected anyone trying to view the page or post will need to enter the password. If the user puts in an incorrect password an error message is displayed.
You can view an example of a password protected page here.
Deleting a post
Posts can be easily deleted either from the ‘All posts‘ screen or or the edit screen for the respective post.
On the ‘All posts‘ screen hover your cursor over the relevant page title and clicking on the ‘Bin‘ button below.
If you are on the edit screen of the post you wish to delete click on the ‘Move to bin‘ button in the publish box.
Once ‘deleted’ a post will stay in the bin for 30 days before it is automatically deleted permanently. This gives you some additional time to reinstate a post if you deleted it by mistake.