People profiles are used to display all individuals who are are or have worked on the project or are part of the team.
People profiles
Video guides


Creating and editing profiles
People profiles are created and managed in a similar manner to pages and posts. To view all profiles on a site click on the ‘People’ item on the main menu to the left when logged into the backend area of your site.
Editing existing profiles
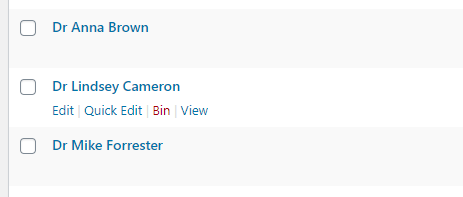
Here you will see a list of all of your profiles. To edit an existing profile you can click on their name. By hovering over the profile you will see further options appear under the profile name. These include ‘Edit’ and ‘Bin’.
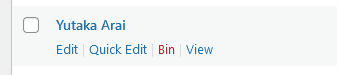
Clicking on ‘Bin’ will delete the profile, making it no longer accessible to the public and it will not appear on any people panel. You can restore this profile by clicking on the ‘Bin’ link at the top of the page and then choosing ‘Restore’ for each relevant profile you wish to make live once again.
Any profiles left in the ‘Bin’ will be permanently deleted after 30 days. If you wish to hide a profile from the public but keep it for future reference we would recommend changing the ‘Status’ to draft from the edit screen.
Creating a new profile
To create a new profile you can click on the ‘Add New’ button…
- located underneath ‘All People’ on the main menu
- on the ‘All People’ page at the top next to the title
- whilst editing an existing profile, located at the top of the page next to ‘Edit Person’
People profile options
People profile name
The main name/title field is used in multiple ways, primarily it is used for:
- The name of the person displayed on the people panel
- Will form the ‘slug’ of profile web address
You should not include the persons official title, i.e. Dr, since this will be entered into the ‘Title’ field and will be displayed before the profile title.
Profile location
There are three types of profiles you can create:
- Local profile
- External link
- Card only
A ‘Local profile‘ creates a full profile page for that individual which will display the all of the information from the fields listed below. When you select ‘Local profile’ all of the available tabs will appear and you will be able to use the full array of fields. These fields are optional and only those with information in will be displayed on the profile page.
If you already have a profile setup on another site or perhaps a personal website and wish to redirect users to it, whither it be on kent.ac.uk or any other publicly available webpage, then choose ‘External link‘ and type / paste in the full web address into the ‘Link’ field making sure to include http:// or https:// at the start.
If you need to list someone on your page but they do not need a profile page or to link to an external web page you can choose ‘Card only‘. This is useful for members of the team such as PhD students who are to be acknowledged but do not need a full profile page. For this option you only need to consider filling in the following fields: Title, Image, Role, Description, Email, and Phone.
Main profile options
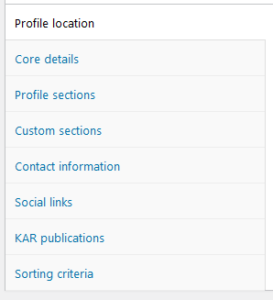 When creating / editing a profile you will be presented with a series of tabs. Each tab is designed to make it easier to navigate to the information you wish to edit quickly and easily, rather than having one long form to complete. Depending on if you choose local profile or external link a different set of tabs will be displayed.
The main tabs are ‘Profile location’, ‘Core details’, ‘Contact information’, and ‘Sorting criteria’. These will be displayed regardless if you select local profile or external link as a source.
Core details
The core details are required to display a profile card on the people panel. This tab has the following options:
- Title – Ensure any title such as Dr, Prof, etc is entered here and not in the profile title
- Photo – You to upload an image or select one from the media library. This must be in a square format at a minimum of 500 x 500 pixels. Read more on our Digital standards site about how to choose a professional photo for your profile headshot.
- Role
- Description (max 80
- Name pronunciation – Here you can upload an audio recording of your name for people to playback on your local profile page. If added a small play symbol will appear to the right of your name. Please note that you can only upload a MP3 file no larger than 1Mb.
There are a variety of online audio recorders which will allow you to use your webcams microphone and then download the recording as an MP3. One such site is https://online-voice-recorder.com/ - Pronouns – Here you can choose pronouns to let others know how to refer to you. If you select ‘Custom’ a text ox will appear allowing you to type in your own. The pronouns will appear to the right of your name.
- She / Her
- He / Him
- They / Them
- Custom
Contact information
These fields are optional:
- Phone
Sorting critera
- First and Last name – These fields are required to allow for the sorting of profiles
- Numerical order – Optional field, but allows you to set the order of profiles by a number value
Most of these fields are simple text fields that allow you to freely type into or copy and paste text in.
Local profile options
If you choose to host the profile on your website there are a few additional tabs and fields provided. All of these are optional, but the more information provided will result in a more in-depth profile.
- Profile sections
- About
- Research interests
- Teaching
- Supervision
- Professional
- Custom sections
- Contact information
- ORCID ID
- Location
- Office hours
- Social links – You can apply one or more links to social and academic platforms
- KAR Publications – This option works the same as the KAR panel.
The tab called ‘Custom sections‘ allows you to add as many sections to a profile as you wish, each with its own title and WYSIWYG content field. Every section you add will be added to the page links at the top of the profile. You can also drag and reorder, or delete the sections as required.
ORCID iD
Local profiles also have the option to add their ORCID iD under the contact section. This will appear as a linked in the sidebar, the same as it does on kent.ac.uk
Criteria for sorting profiles
The People panel allows you to sort your profiles based upon five criteria:
- Date published – newest first
- Date published – oldest first
- Title – A-Z
- Firstname – A-Z
- Lastname – A-Z
- Numerical – 0-9
- Numerical – 9-0
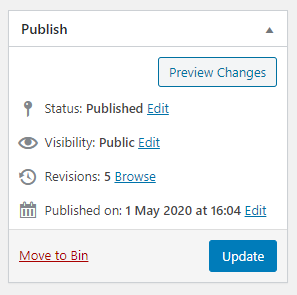
The ‘Date published‘ options are based upon the date of when the profile was published. This can be found in the Publish box on the right side of profile edit screen. You can also see the date from the ‘All People‘ screen when you click on ‘People‘ on the main menu within the dashboard.
To change the published date of the profile:
- Click on ‘Edit‘ link next to the published on date
- Enter a new date and time. The order is ‘Month’, ‘Day’, ‘Year’, ‘Hour’, and ‘Minute’
- Then click ‘Ok‘ to confirm
- Click the ‘Update‘ button to save your changes
The ‘Title‘, ‘Firstname‘, ‘Lastname‘, and ‘Numerical‘ options are based upon the respective fields on the profile edit screen within the core details tab.
Note: When configuring a people panel if you choose to sort the profiles you will need to ensure that all of the relevant fields are completed fully for it to work.
Deleting a profile
There are two ways you can delete a profile:
- From the ‘All people‘ screen you can hover over a profile and click on ‘Bin‘
- Or from the edit screen for an individual profile you can click on ‘Move to bin‘
As mentioned above, any profiles left in the ‘Bin’ will be permanently deleted after 30 days.