On this page
The Table panel provide a helpful and easy way to add tabular data to your pages.
Panel settings
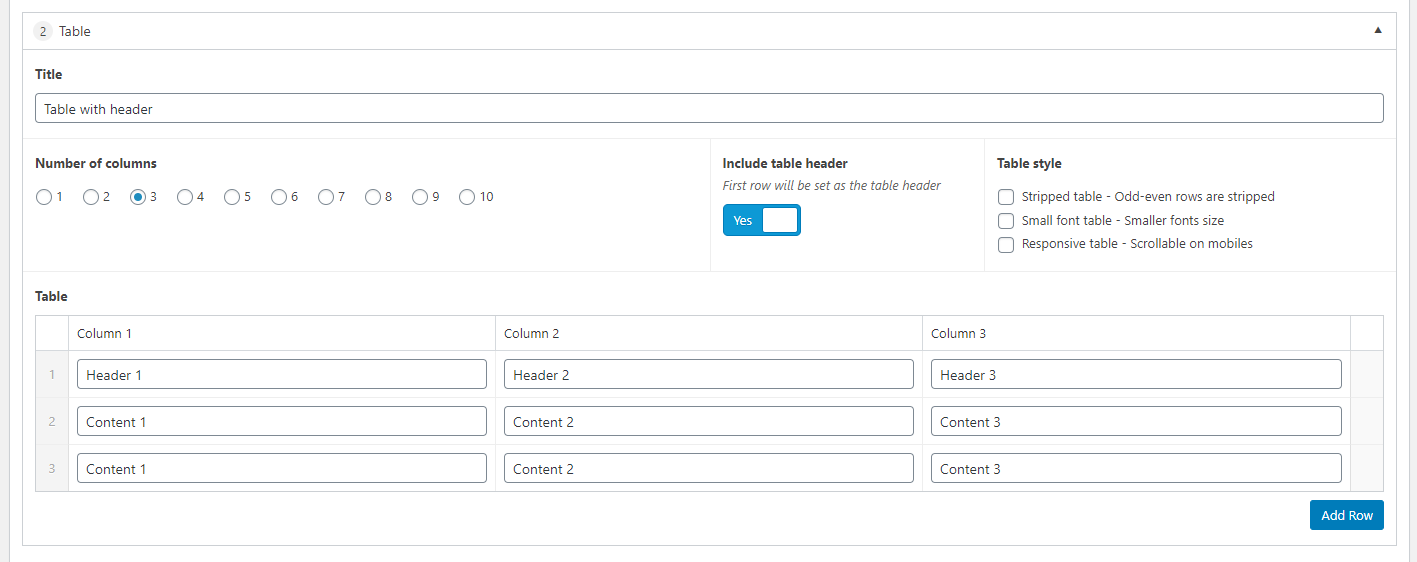
The Table panel is simple to setup and configure, and you can have multiple tables throughout your a page.
- Title – Optional
- Number of columns – At present you can only go up to a maximum of 10 columns
- Include table header – If you toggle this option to yes the first row of the table will be treated as a header row and styled accordingly to differentiate it from the main table rows
- Table style – Here are a couple of options you can use to alter the styling of the table, including colouring alternating rows to make larger tables easier to read. This list may change in future as we add more features
- Table – This is where we add and edit data on the table
Once you have specified all of the settings for the table just click on the ‘Add row‘ button for each row you wish to add to the table.
You can only add text to tables at present, no links or images.
It is worth noting that the tables are now responsive by default, and on smaller screens the table will break down into smaller tables, one per row, making it easier to review datasets.

CSV Data
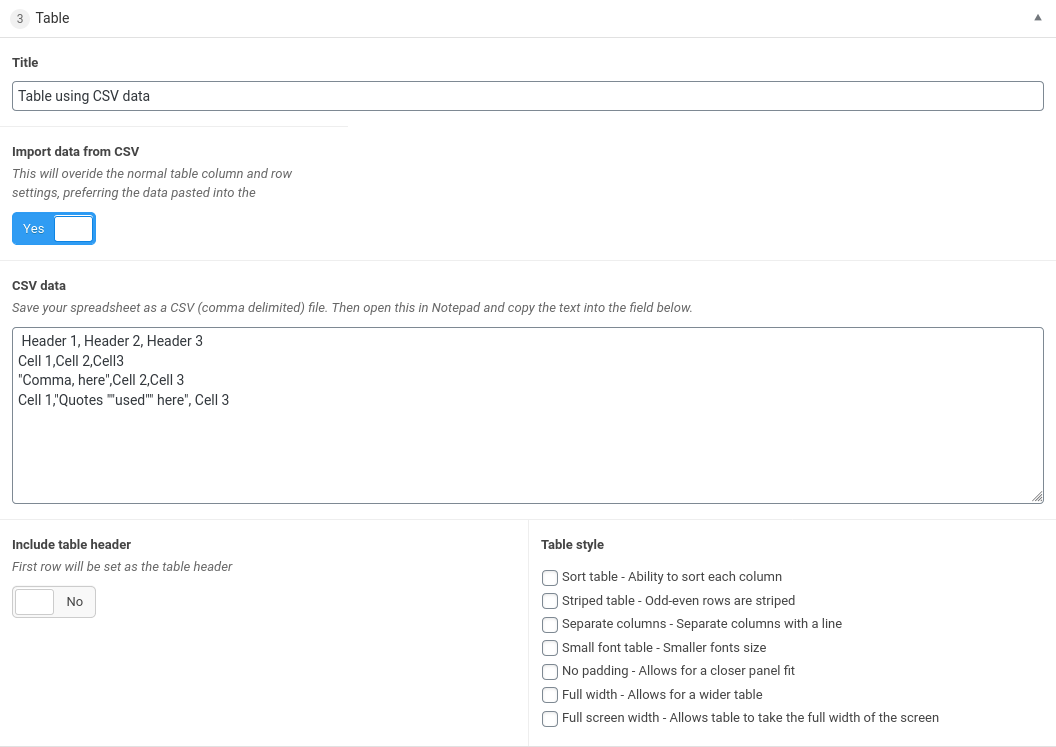
In addition to using the built-in table editor you can use data formatted in CSV to create a table by toggling the “Import data from CSV” switch. The built-in table editor will now be replaced by a text area where you can paste in the CSV data. Please not if any cells have special characters such as commas or new lines encapsulate the entire cell in double quotes. If a cell contains one or more double quotes encapsulate the cell with double quotes and the double quote within the cell with a second double quote. The screenshot below shows regulars cells, a cell with a comma and one with two double quotes.

Sortable Table
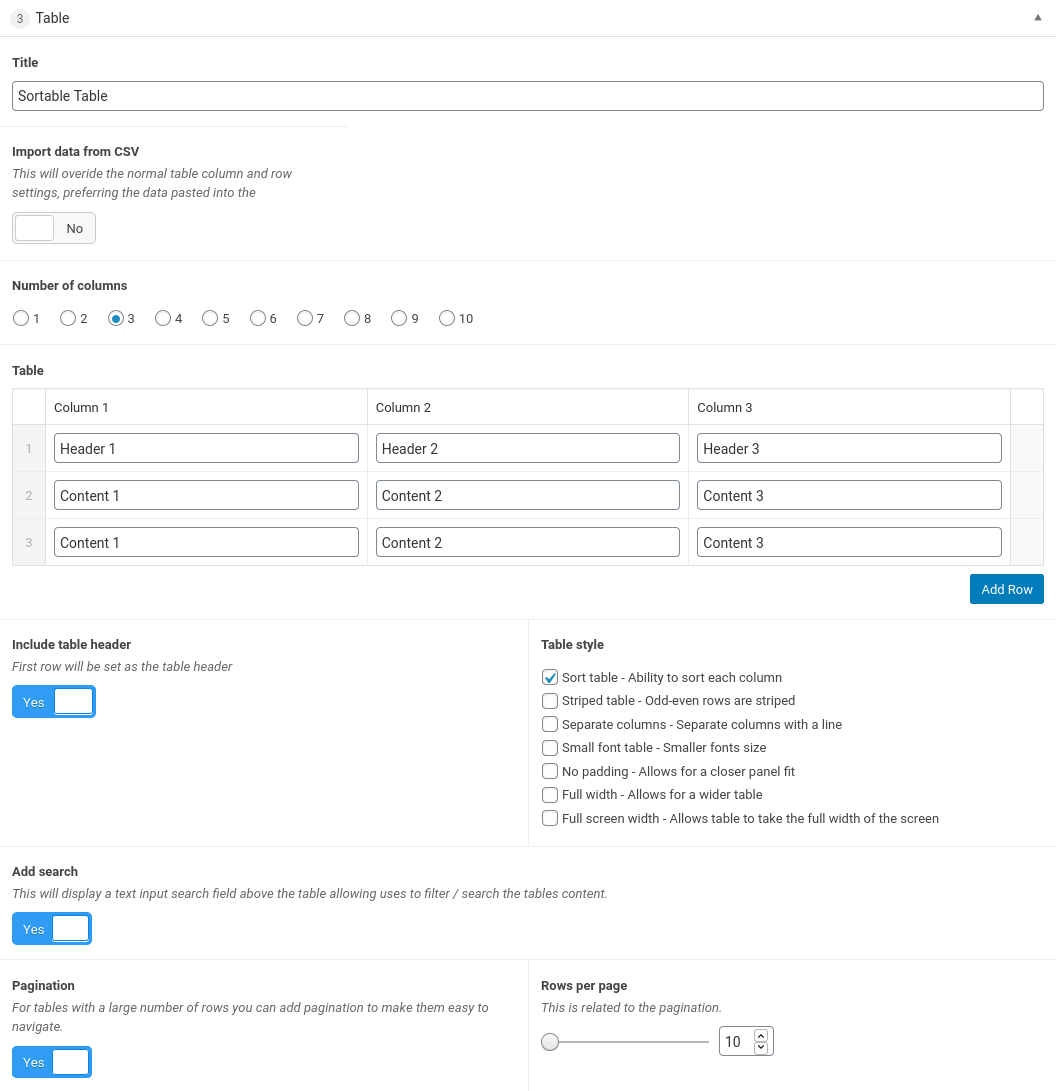
Under “Table Style” the Sort table option allows the table to be sorted by each column. This also adds the ability for the table to be paginated or searched which can be toggled on or off.
